
Introduction to n8n: Creating a Virtual Assistant with AI (Part 1)

Automation is no longer a luxury. It’s a strategy.
And when we combine automation, AI, and no-code/low-code tools, we open up space to build real, useful, and scalable solutions, even without writing a single line of code.
In this article, we’ll take the first step on this journey using n8n.
Follow our page on LinkedIn for more content like this! 😉
What is n8n?
n8n (pronounced “n-eight-n”) is an open-source workflow automation tool that allows you to connect different services, APIs, and systems in a visual way, without needing to be an expert programmer.
Instead of writing code, you:
Create workflows
Connect nodes
Define rules and actions
Automate repetitive tasks or entire processes
It is often compared to Zapier or Make, but with two major advantages:
Open source, meaning we can host it for free on our own server
Much more flexible, especially when integrated with AI and external APIs
In addition, it has an intuitive visual interface where we literally “draw” our workflows by dragging and connecting blocks.
Why is n8n perfect for AI projects?
n8n stands out when it comes to artificial intelligence and automation because it offers:
Native integration with LLMs: Easily connects with OpenAI, Anthropic (Claude), Google AI, and others
Data flexibility: Manipulates AI responses and routes them wherever you need
End-to-end automation: From receiving a message to saving information and scheduling appointments
Powerful webhooks: Receives requests from chatbots, WhatsApp, Telegram, and much more
Let’s build our first application!
Now that we’ve seen what n8n is and its advantages, it’s time to get hands-on!
We’re going to create a virtual assistant that helps clients schedule appointments at a Beauty Salon, chatting via Telegram.
The assistant checks available time slots and records appointments in Google Calendar, in addition to storing booking details in a Google Spreadsheet.
Creating our Telegram Bot
The first step is to create our bot on Telegram. Download the Telegram Desktop version from the official website and open the application (on your phone or computer).
Now, click on the search bar at the top of the screen and type “botfather” (the official bot has a verified icon next to its name). Click to start a conversation with the bot.
Type the command “/newbot” to create a bot on Telegram, and choose a name for it. Then, enter a username that ends with “bot”, with no spaces.
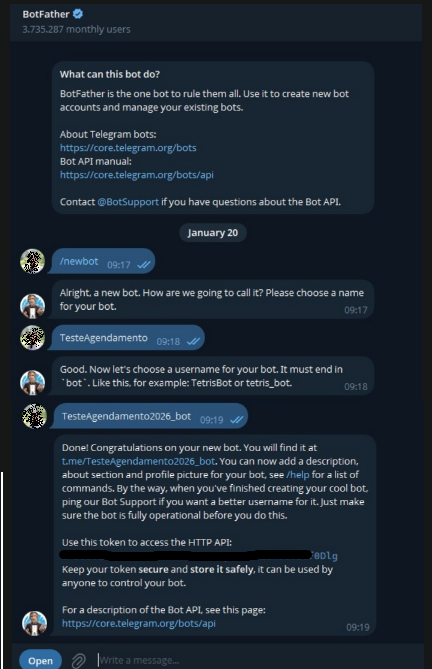
Done! Bot created 😁
BotFather also sends a message with the link to your bot’s chat, along with an API token. Save this token and do not share it with anyone.
Creating the Workspace
Let’s move on to n8n!
In this tutorial, we’ll access the platform and create our workflow directly through the website, but you can download the source code and install it locally if you prefer (GitHub).
Go to the official website and sign up. In the free version, you get 14 days for free to test the tool.
After signing up, wait while the Workspace is being created.
Click on “Start automating”.
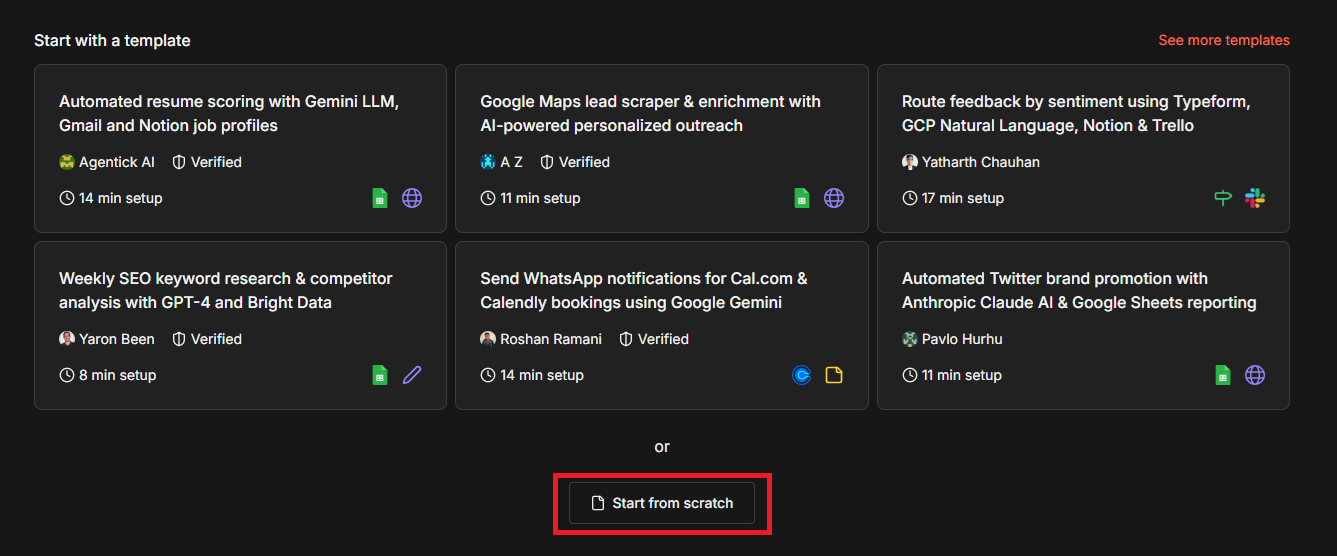
You can select a ready-made template or create one from scratch. Here, since the focus is educational, we’ll start from scratch.
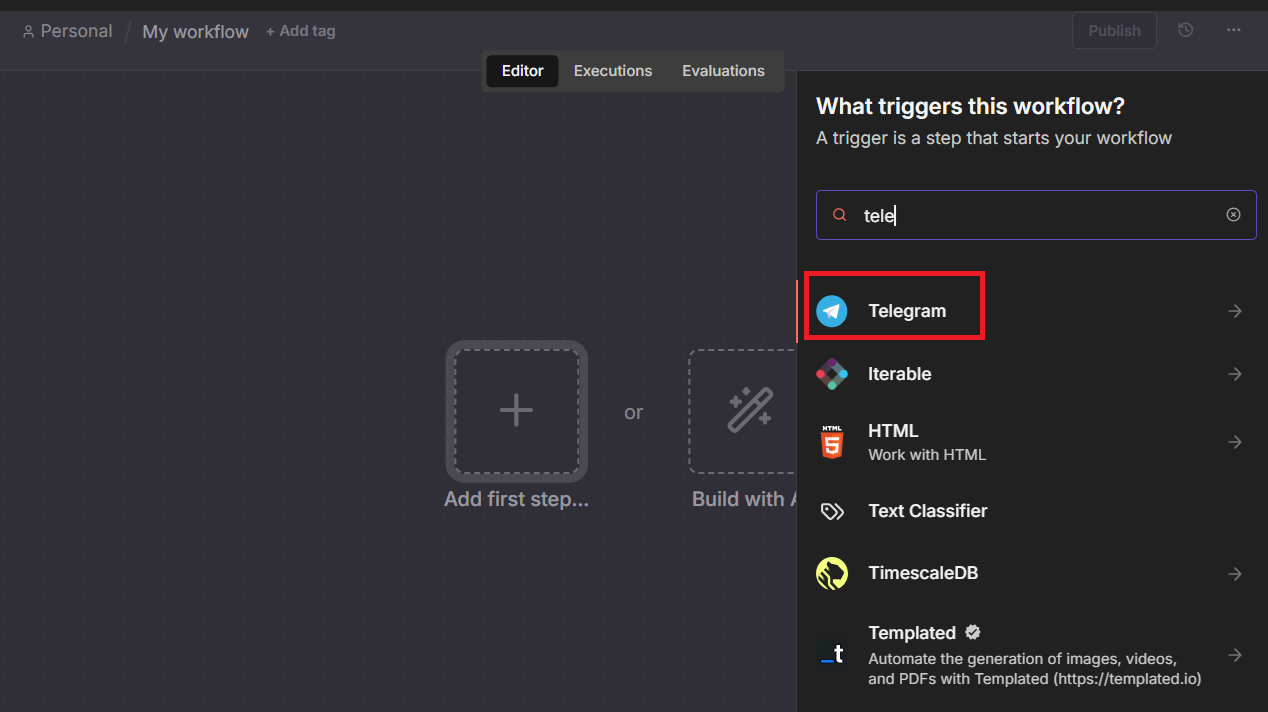
Now let’s click on “Add first step” and select our trigger, which in this case will be a Telegram message.
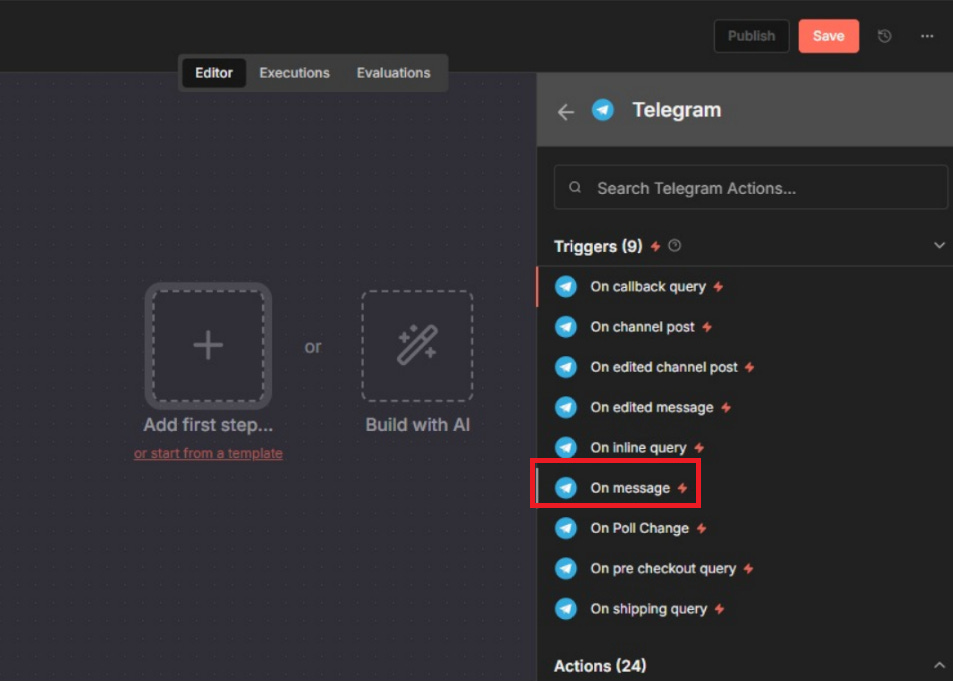
Select the “On message” event so the assistant is triggered whenever it receives a message via Telegram.
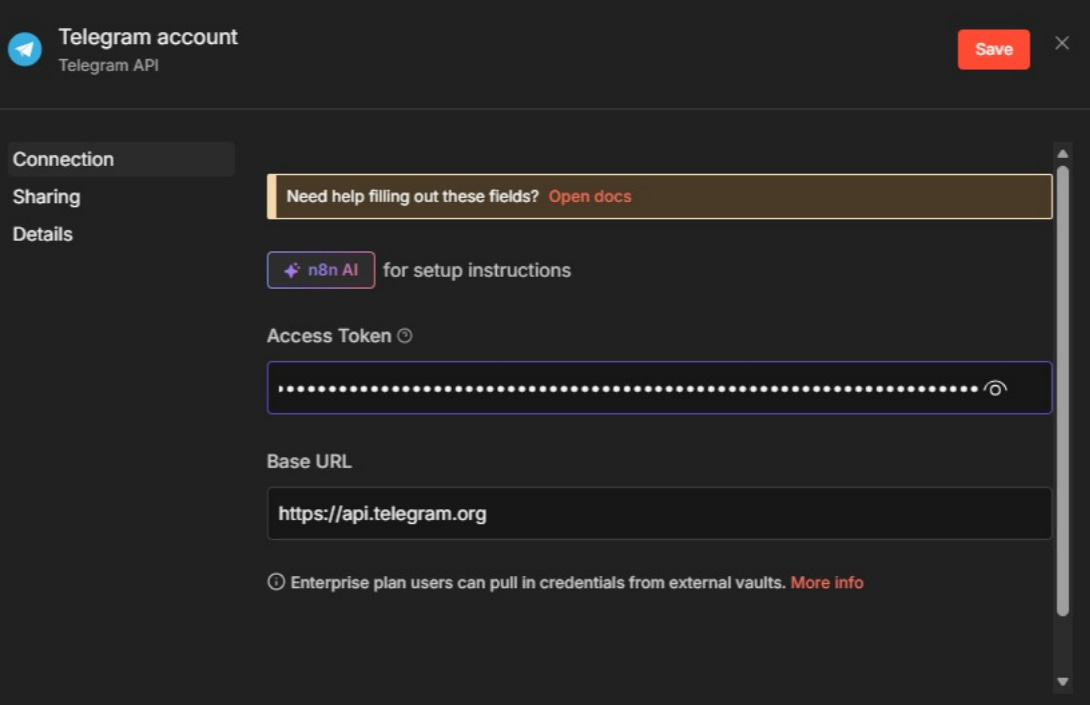
Let’s paste our Telegram bot token here. Click to add a new credential:
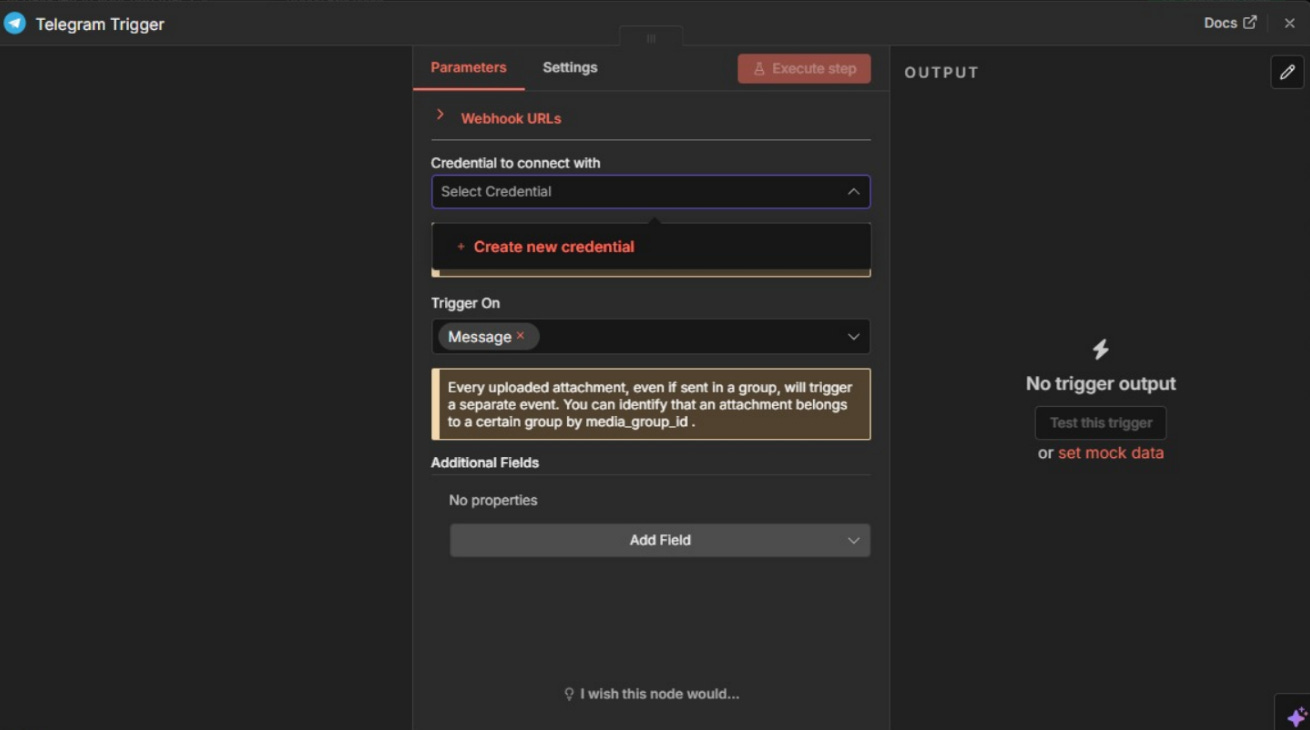
Paste the Telegram bot token generated by BotFather:
And we have the first step of our workflow! ✨
Sending our first message
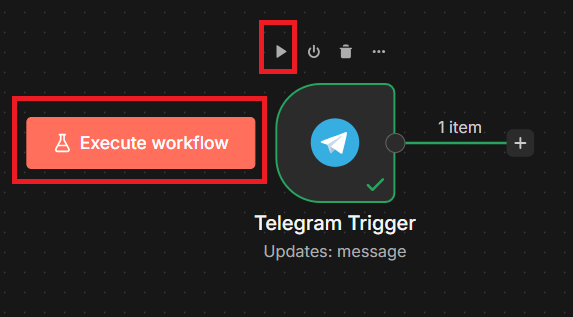
Now that we have our first step, click to run the workflow using the “Execute workflow” button or the “Play” icon:
Now go to Telegram and open your bot (use the link that BotFather created), and send any message.
Your n8n workflow will be executed with your Telegram message, which acts as the trigger to start it. However, nothing will happen since we don’t have any other steps yet.
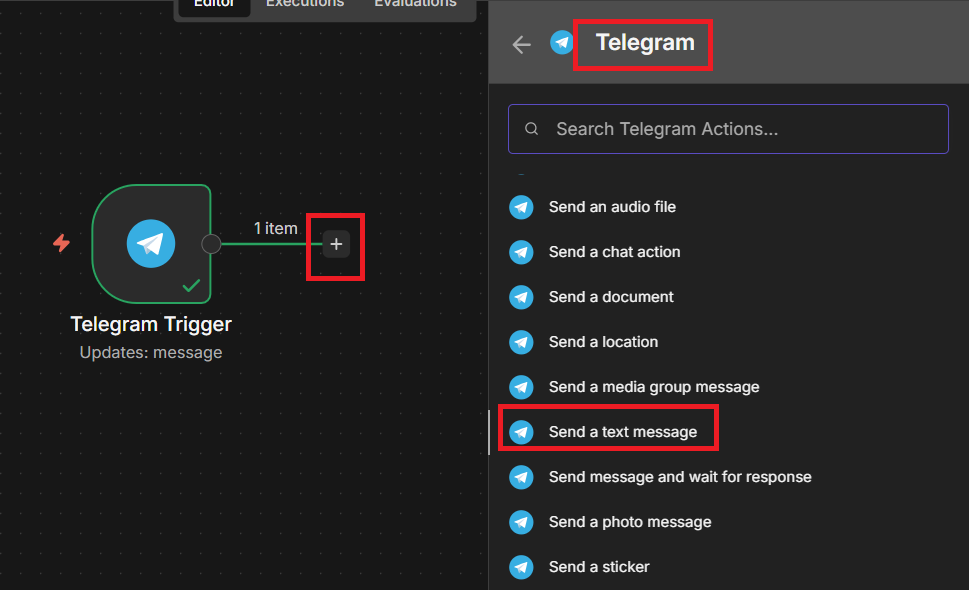
Just to test message sending, add a Telegram message-sending node, as shown in the image below:
Drag the “id” field from the “chat” menu (on the left) into the “Chat ID” field, and the “text” field into “Text”.
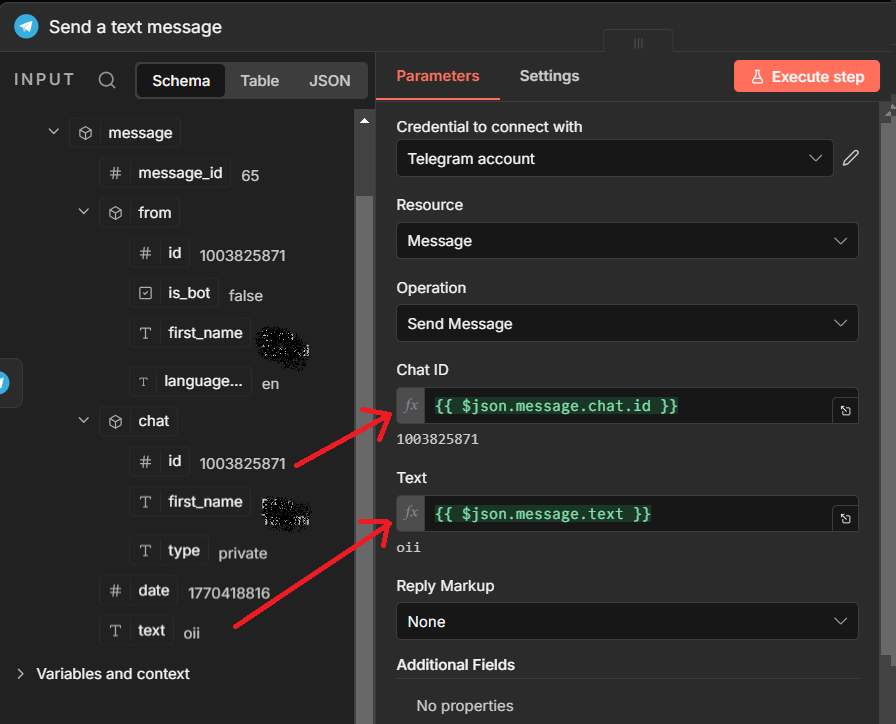
Click on “Execute step” and you should receive the same message you sent in your Telegram.
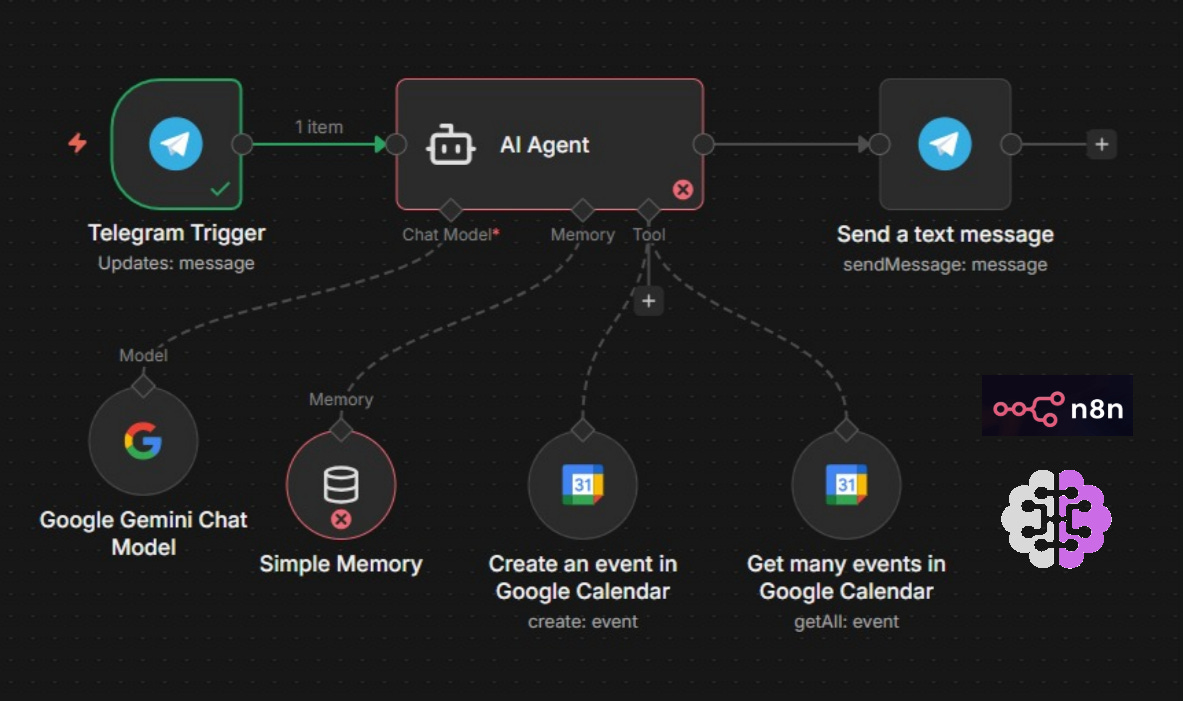
Our workflow now looks like this:
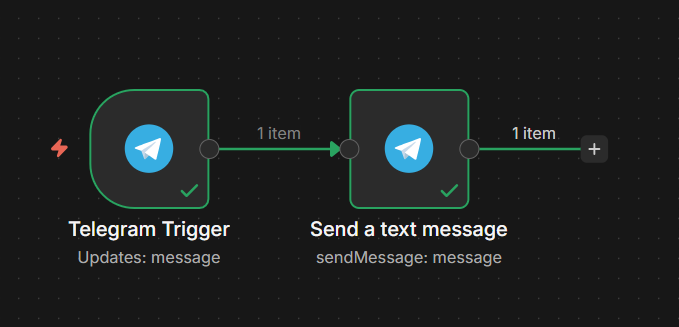
For now, it’s configured this way just for testing. In the next article, we’ll connect our workflow to an LLM and make our bot answer user questions.
Next steps
We already have our first mini automation workflow with n8n! It receives a message via Telegram and replies with exactly the same message.
In our next article, we’ll connect the workflow to an AI agent node, making it possible to chat with our assistant.
See you in the next article! 👋🏼