
Jupyter AI: Transforming the Notebook into an Intelligent Laboratory

If you work with data, research, programming, or artificial intelligence, you probably already know Jupyter Notebook, a tool that dominates laboratories, universities, and data science environments around the world.
But now it has gotten even better.
With Jupyter AI, researchers, students, and professionals gain access to an intelligence layer inside the notebook itself: an integration that not only accelerates tasks but changes the way we think, learn, and develop solutions.
In today’s article, we’re going to understand what Jupyter AI is and see a practical example of how to install and use it with local models using Ollama.
What is Jupyter AI?
Jupyter AI is an open-source extension developed within the Project Jupyter ecosystem that integrates language models (LLMs) directly into the Jupyter environment, transforming notebooks into even more powerful tools for data scientists and developers.
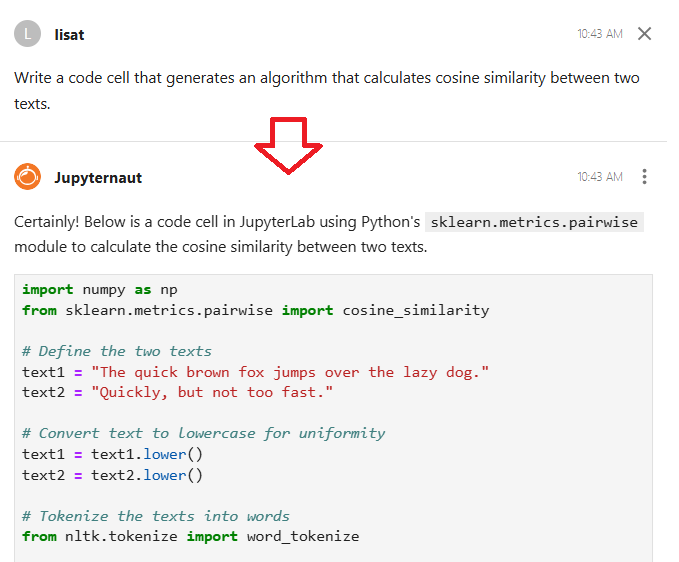
The tool works as an intelligent copilot, capable of generating code, explaining concepts, fixing errors, and even creating full visualizations from natural language commands.
Main Features
Custom Magic Commands
Jupyter AI introduces magic commands that make it easier to interact with AI models. With simple lines like %%ai, you can ask the model to generate Python code, create complex functions, or explain specific libraries.
Integrated Chat Interface
A side chat interface allows continuous conversations with the AI assistant, maintaining the context of your session. This is particularly useful for interactive debugging and data exploration.
Support for Multiple Providers
The extension supports multiple LLM providers, including OpenAI, Anthropic (Claude), Hugging Face, and local models. This flexibility allows choosing the most suitable model for each task.
How does it work in practice?
Step 1 - Installation and Configuration
Installation is simple through pip:
Keep reading with a 7-day free trial
Subscribe to Exploring Artificial Intelligence to keep reading this post and get 7 days of free access to the full post archives.